

How to shoot amazing available light Portraits with paper
As you can easily see from my portraits, I don’t work in studios. It’s not that I don’t like studio portraits, because I do like them quite a lot and respect the craft as well. And sometimes, yes sometimes, I wish I could also shoot beautiful portraits like the ones in the studio. But here I’m, just a small photographer, and it’s just not a budget option at the moment.
But Daniel, just take a flash, softbox and mobile background and use it as a mobile studio!
Angry reader
Hold on, of course you could take a flash, softbox, tripod and foldable background with me (only to find out on set that you forgot the flash trigger, happed way too often) but I don’t want to carry so many things with me – being flexible you know.
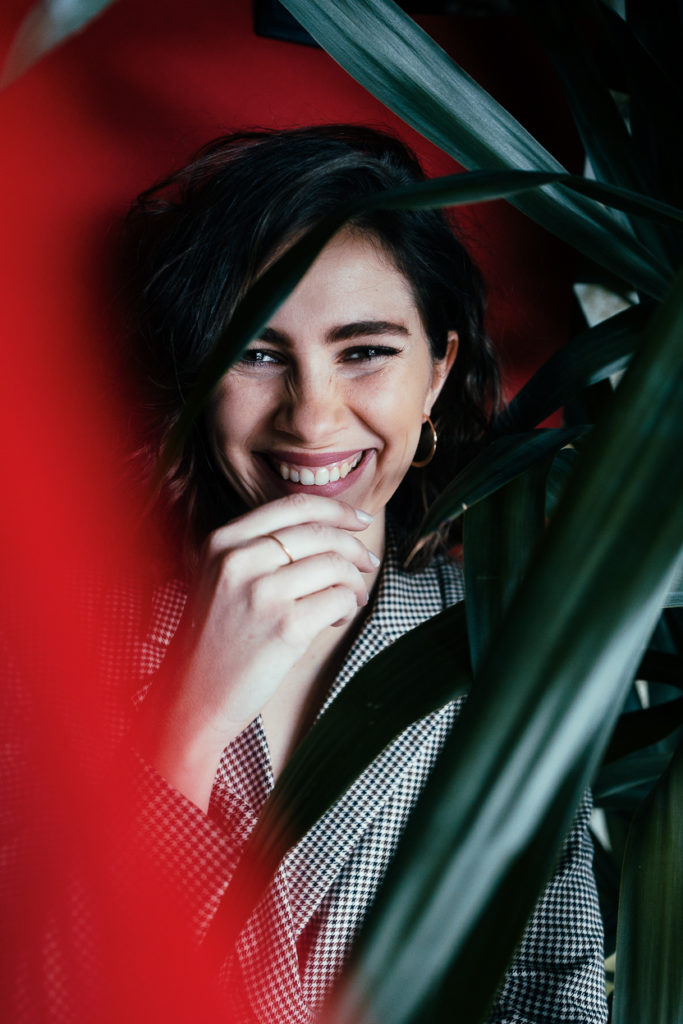
To try out studioish portraits, with as little equipment as possible, I meet with the model Anna (check out her Instagram) to start an experiment with colored paper in DIN A3 format, a tripod and the light of a rainy day. Here is the setup for the pictures:
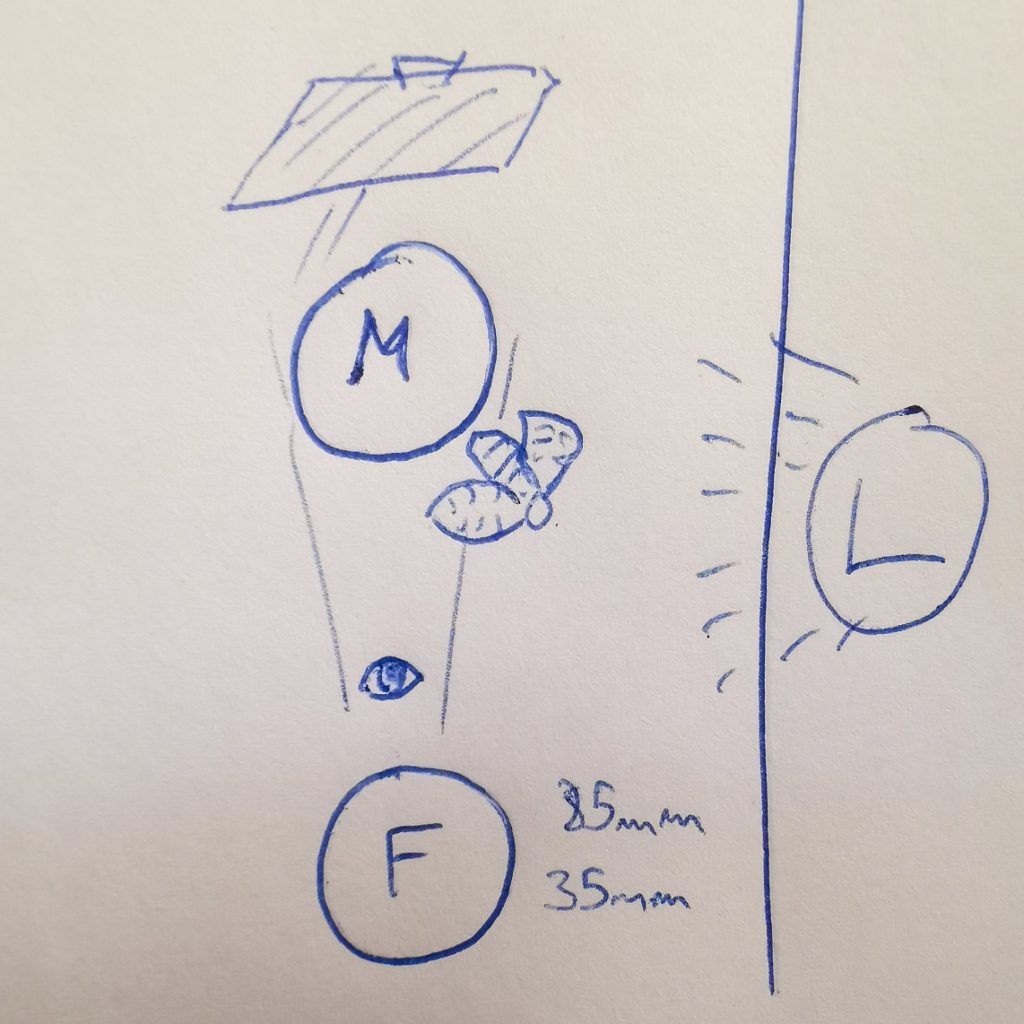
M=Model, L=Light und F=Photographer.
Looks simple, but the devil is in the detail
The whole setup is not rocket science, paper is placed on a tripod behind the model and close to the window, so you get to light up her face from the side, simple enough. As far as the outside permanent light (aka the sky) is concerned, however, there are differences that have a huge impact. On a cloudless, sunny day you could forget these portraits because the sunlight is far too strong and not fit to light the face evenly.
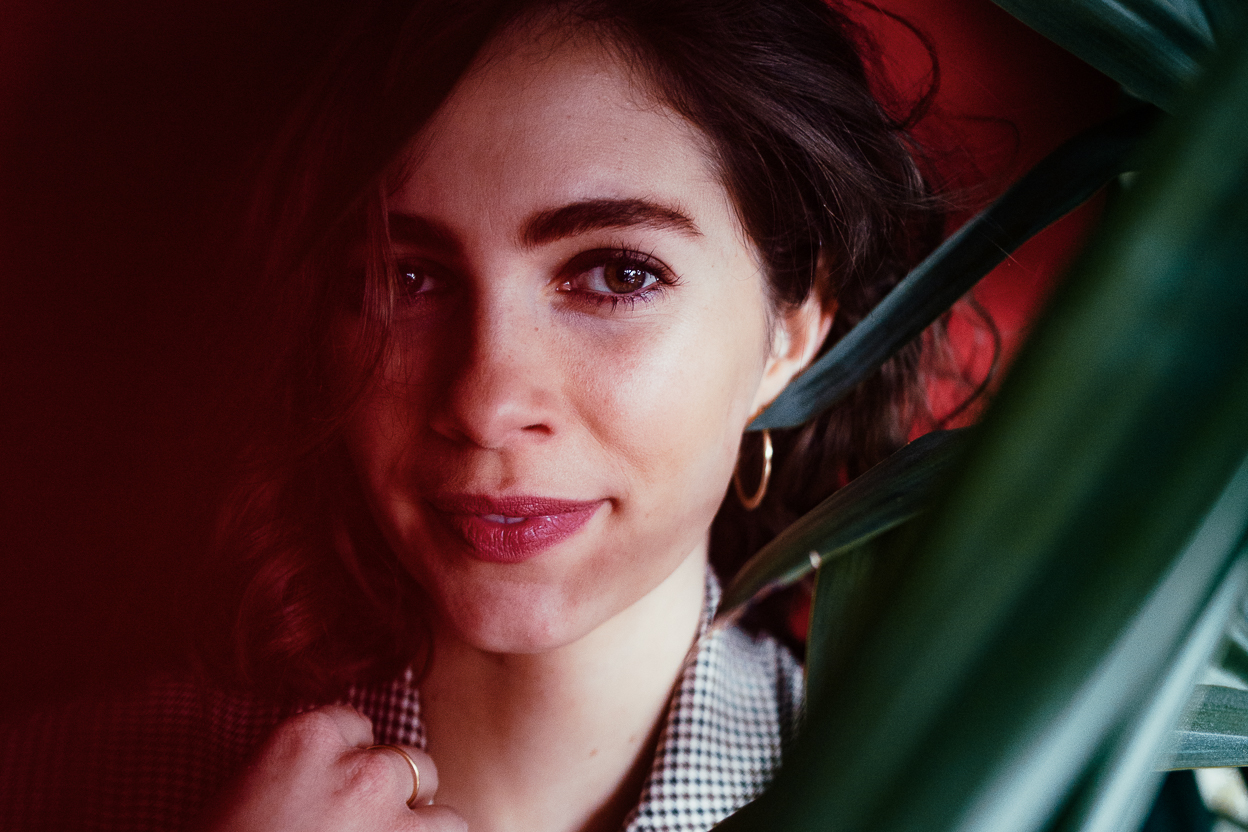
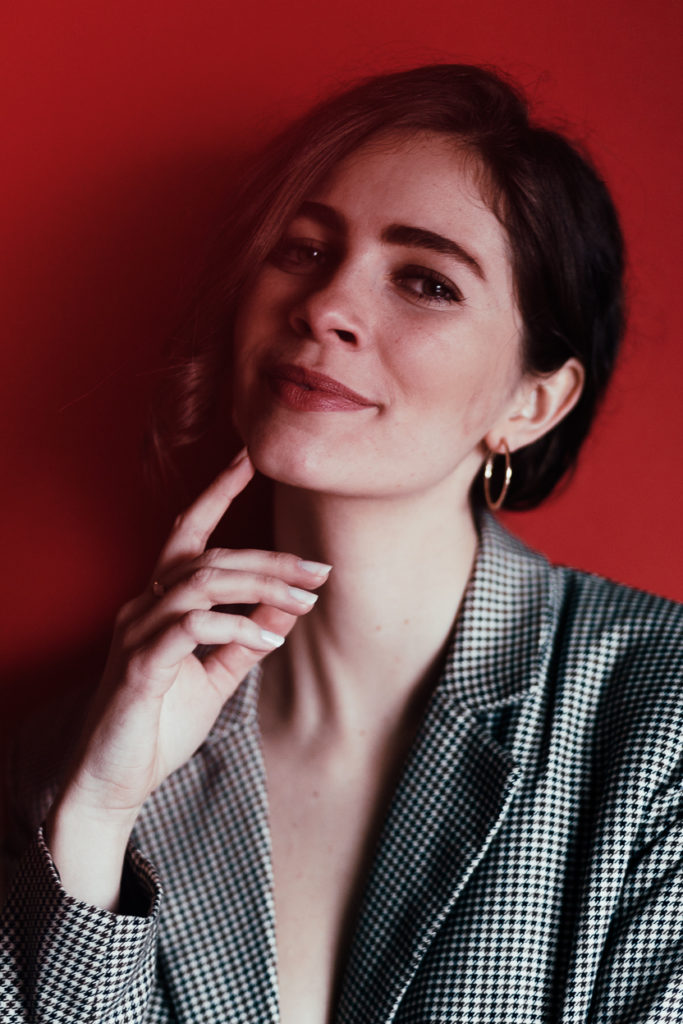
A cloudy day is perfect, it can also rain, storm or snow (because you shine like the sun you charming gem): The main goal is that the light is really soft and even. I took the first pictures with a classic 85 mm portrait lens.
ISO 640, f1.8, 1/160 Seconds.
Not so bright: Portraits in low light
As nice and soft as the cloudy weather is, it is simply not particularly bright and if you additionally take photos indoors, then you have to be prepared for small compromises. A lens with good low light capabilities helps to cope with this situation, that’s a lens that has an aperture of less than f2.0 and can therefore capture a lot of light (the lower the f-value, the further the lens opens and more light gets through to the sensor).
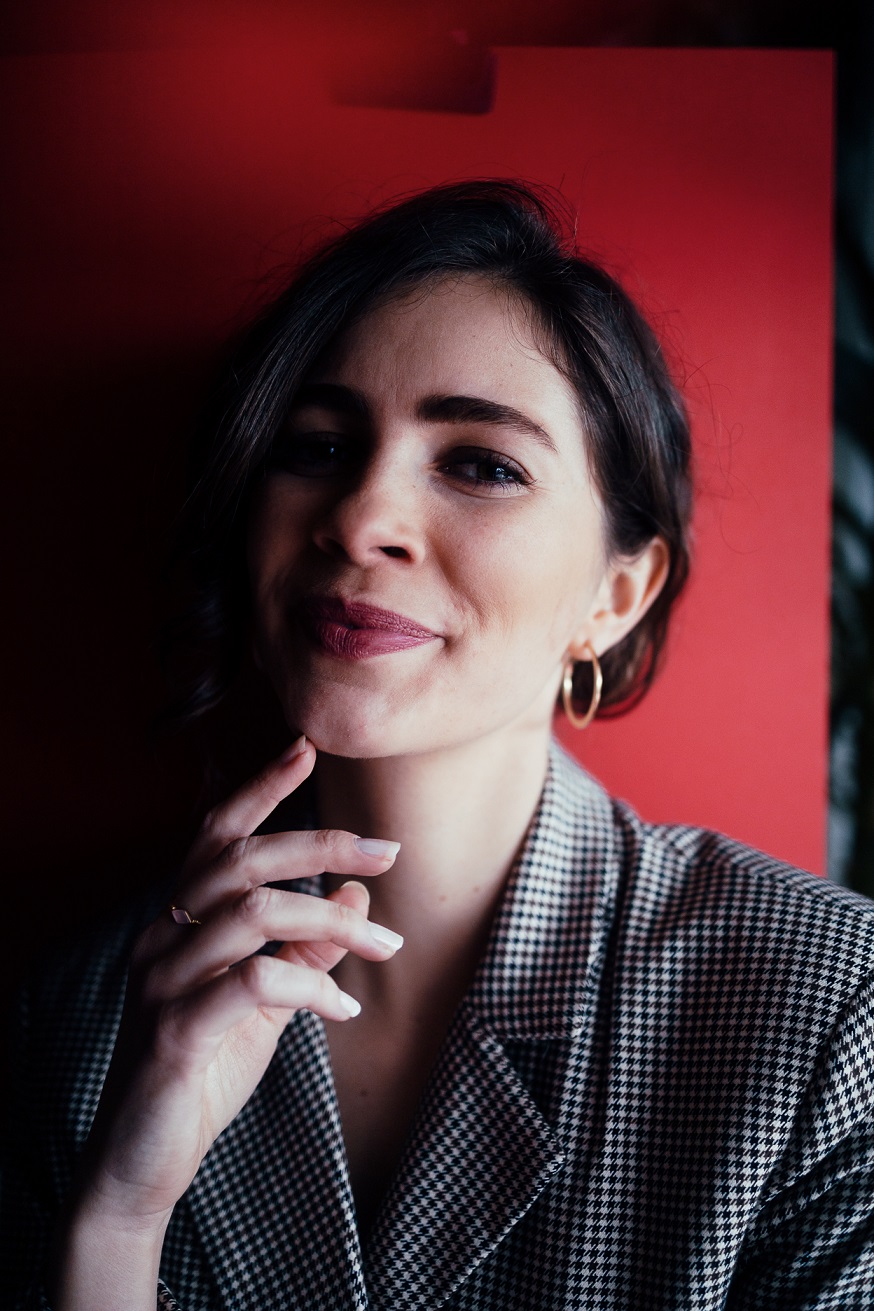
In all the portraits I opened the lens as wide as possible, with both lenses the limit is an aperture of f1.8, which lets in quite a lot of light. In addition, I minimally underexpose the image, if you shoot in RAW you don’t have to worry about underexposing too much, because most of the details can easily be brightened up again in post-production software. Here you can clearly see what the difference between RAW and the finished portrait looks like:
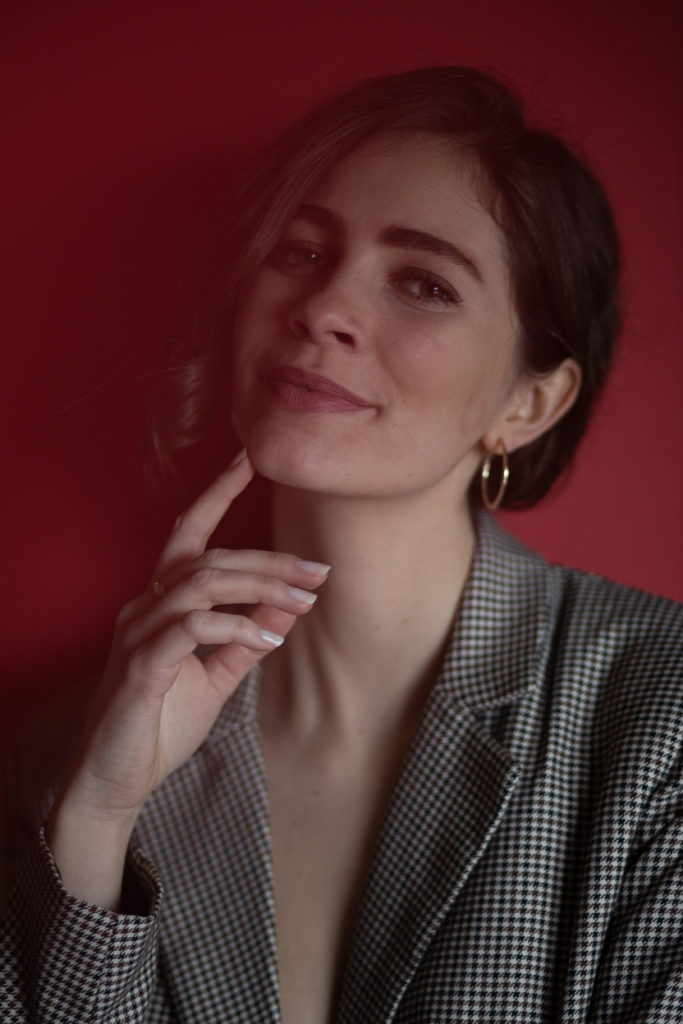
ISO 640, f1.8, 1/160 Sekunde
Taking photos with a low aperture and letting a lot of light hit the sensor at once has unfortunately a “disadvantage“: The actual focus and sharp area becomes very small and easy to miss, which means that you have to be very precise when setting the focus.
What helps me is to set the focus manually while zooming into the image on my screen, then I get for example crispy sharp eyes even with a rather low aperture (instead of details macro shots of the eyebrows). Also, If you take digital photos, you can always take a few more pictures to be safe.
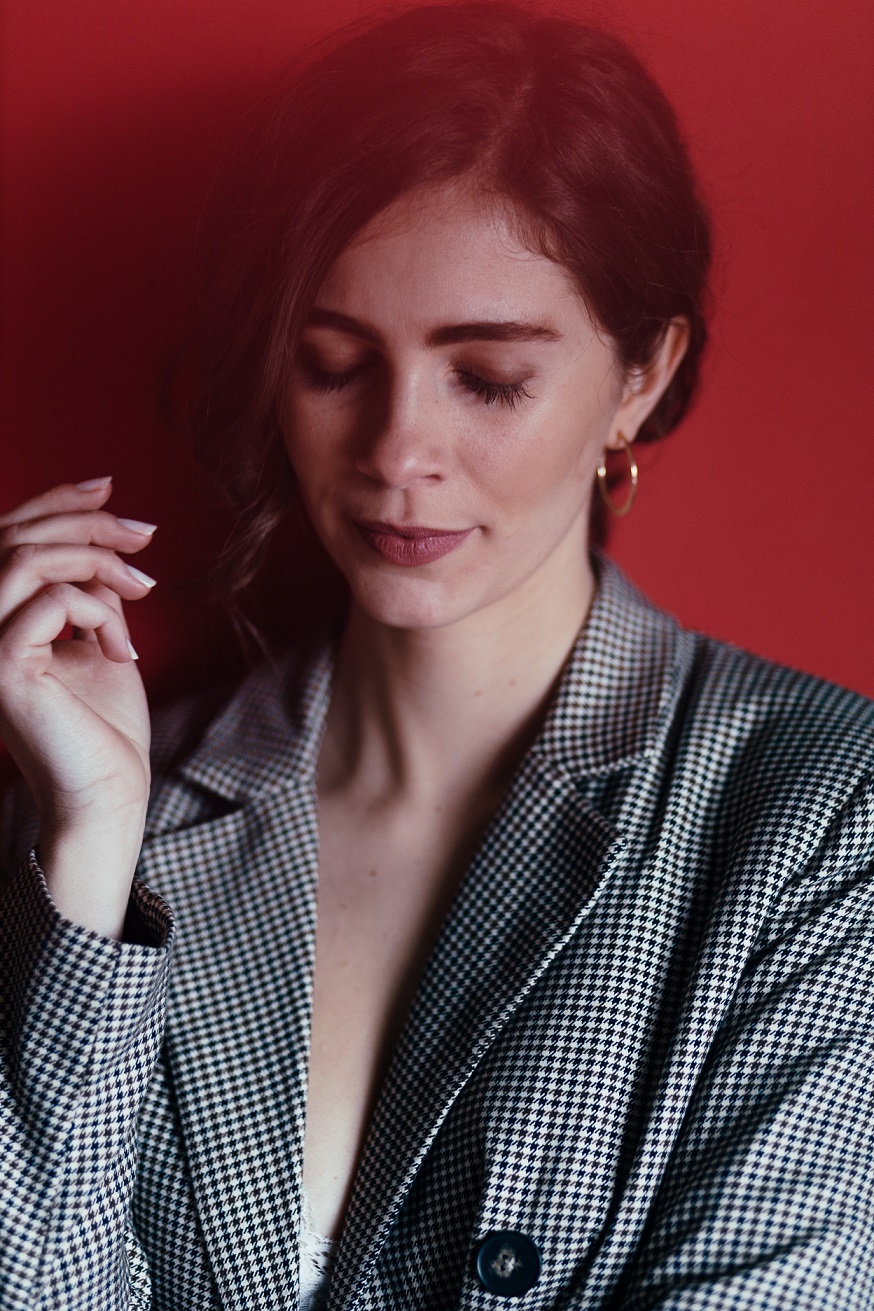
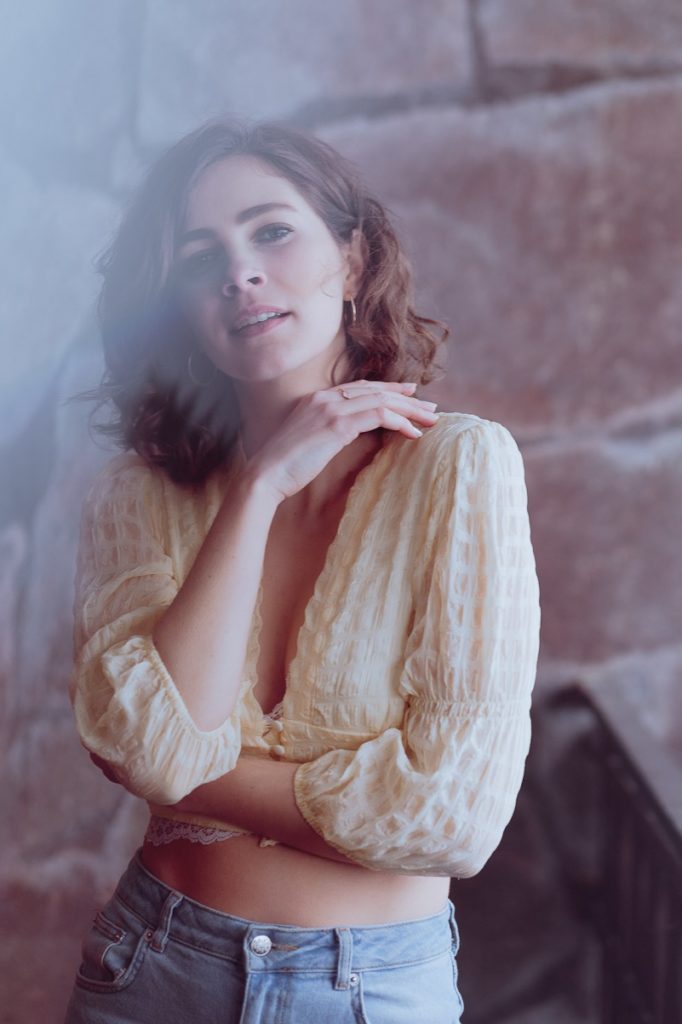
Changing the lens to 35 mm
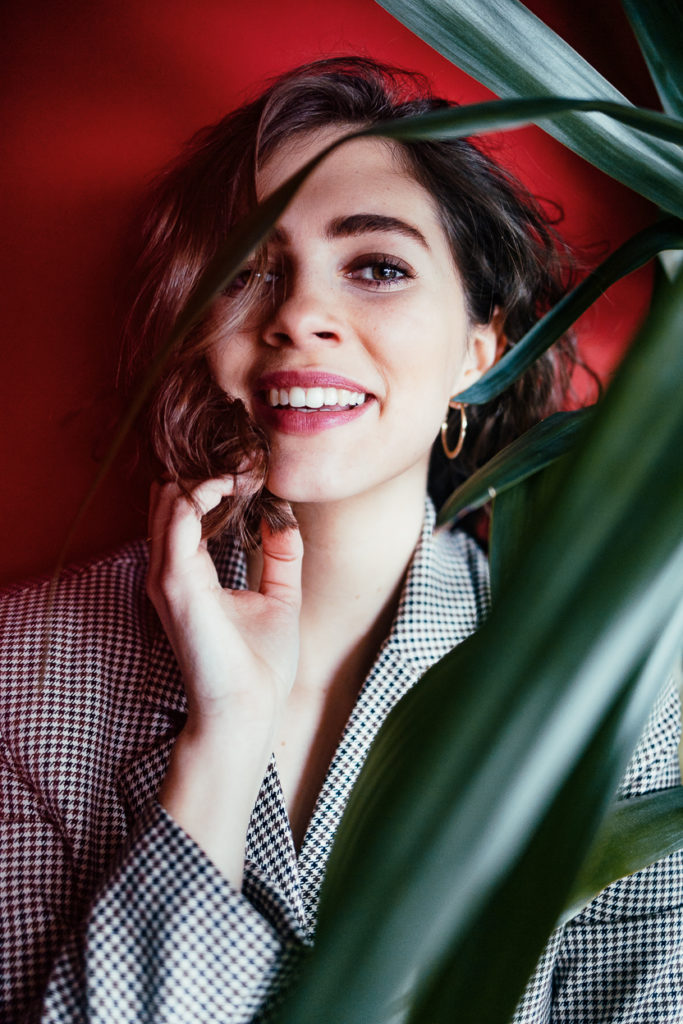
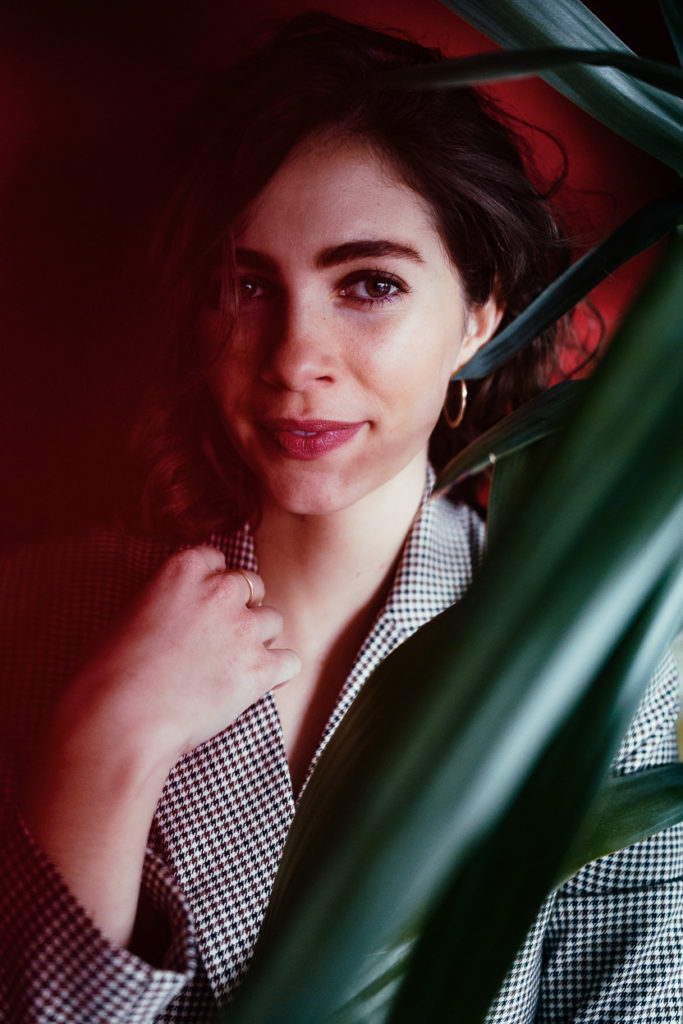
After I had the first pictures with 85 mm, I not only noticed the beautiful houseplant, but also that it is a bit risky to shoot with 1/160 of a second at 85 mm. Risky because (regardless of how far you open the aperture) you should reduce the exposure time of the camera to at least twice the focal length to get a sharp picture.
With a lens with a fixed focal length of 85 mm, this results in at least one (85 x 2) 1/170 of a second. Now my ISO value, despite the maximum aperture of f1.8, is already 640, and I don’t want to push that up any further by setting the exposure time even shorter (the ISO value brightens the image at the expense of quality). So what to do?
The simplest answer for me: switch to a lens with a smaller focal length so that the exposure time can be reduced. With my 35 mm lens, the recommended exposure time is one (35 x 2) 1/70 second. If I now set my camera to 1/100 of a second, I have to try very hard to get a blurry picture taken by hand.
Of course, the whole thing only works if the lens with the smaller focal length has a comparable aperture value, which is of course the case with my f1.8 35 mm.
ISO 400, f1.8, 1/100 Second
One foreground with complementary please
As you can easily see, the 35 mm lens allows a little more leeway with the background and foreground (so much leeway that you can even see the bracket on the tripod in the background that holds the paper).
The houseplant came in handy as a support model. As a special bonus, the dark green complements the background as a complementary color to the strong red, while not being too dominant.
Finally, let’s go on the balcony
After we were finished inside, we went to the balcony, where there were definitely no more problems with insufficient light. However, the paper didn’t give that much as a background there because it was simply a little too small
Instead, I waved colored paper and a prism in front of my 85 mm lens.

Big compliments to Anna
If we as photographers want to try something new, then it’s a slow trail and error process (at least for me … for the others too, right? Right?!). That is why a model in which not only communication runs perfectly from the start, but also poses simply sitting without guidance, is a dream for a portfolio expansion.
Anna is one of those models with whom you can’t go wrong as a photographer. Patient, motivated, in a good mood and self-confident: Did I already mention that you can follow her on Instagram?
Editing: Lightroom
Anyone who knows my edits has certainly noticed that I hardly retouch, soften or emphasize the edges of the face afterward (called Burn & Dodge) Therefore, editing in Lightroom Classic is completely sufficient for me most of the time. With the help of color calibration, I can set the skin tones perfectly without changing other colors.
Since I photographed in RAW instead of JPEG, I can easily get pictures that have become a little too dark brighter. I crush black areas in the picture to add a little gray (no special reason for that, just my personal taste).
By the way, if you don’t own a Lightroom license yet because you’re not ready to spend money on photo editing, I recommend the free APP: Photoshop Express.
All you need is a free Adobe account, and the app already has many reduced features that you can expect from Lightroom or Photoshop. Or just go completely different and use 35 mm film cameras, but that’s a whole different process, that’s absolutely worth exploring.

